Sunday, March 25, 2018

Fixing hard bricks [Qualcomm HS-USB QDLoader 9008]

EVERYTHING IN THIS GUIDE IS DANGEROUS AND CAN COMPLETELY DESTROY YOUR DEVICE IF DONE INCORRECTLY. YOU HAVE BEEN WARNED
PLEASE READ EVERYTHING

DO NOT DO THIS IF IT'S ONLY A SOFT BRICK!!!

Quote:
By following this guide you agree that I TAKE NO RESPONSIBILITY FOR BRICKED OR DAMAGED DEVICES.
You and only you decided to follow these instructions.

What is a dead (hard bricked) device?
Quote:
A dead or "hard" bricked device is a device that has been bricked beyond repair. Usually a corrupted boot partition failing to load the kernel or any type of recovery menu in order to restore. Motherboard swap is most commonly done in order to fix such device. Some devices such as our own have "leaked" service packages that can be used to restore a hard bricked device. Beware that this is not a 100% guarantee. It might or might not work.

How do I know if my device is hard bricked?

It would fail to boot and enter recovery/download mode. When connected to a PC and powered on Windows will detect it as Qualcomm HS-USB QDLoader 9008.

Instructions
  1. Download and install drivers from here
  2. Download BoardDiag v2.99a from here
  3. Download TOT files from here
  4. Unpack all archives in a new folder in the root of your C: drive. Everything including the tot file.
  5. Remove the batter from the device
  6. Plug the device in to the PC via the USB cable.
  7. Place battery back
  8. Open BoardDiag and set it up as such:

    Quote:
    AP Chipset: W3 W5 (ms8610)
    Com Port: Get port num from device manager.
    Target Dir: The new folder you created in the root of C:
    BIN: Select .tot file
    DIR: The new folder you created in the root of C:
  9. Click on the EXTRACT button and wait until it finishes.
  10. Make sure there are ticks on AP Check and EMMC Test !
  11. Press START and wait until the program finishes.
  12. When done it's safe to disconnect the phone from the PC.
  13. Pull the battery out and place it back in and try to enter Download mode. If successful you should be able to flash KDZ following this guide.

Monday, March 19, 2018

CSC Selection for SM-G95XF/FD/N and SM-G93XF/FD/K/L/S/W8 devices running a full s8

What is this for?
CSC stands for Country Specific Code, so every single country (and even different providers in one country) have different codes, for csc features, wallpapers, wifi calling, VoLTE, sounds etc. So it is quite important to have the right csc file on your phone for your provider (so you can have all features which comes with your provider (like wifi calling)).
You may ask yourself now, where can this be flashed on? Basically on every stock based rom, as well as on stock roms (who are rooted of course). So: rootand a recovery (custom) are required!
Your current country is not listed below? Send me your stock csc file from sammobile.com (SM-G955F variant) and I will add it!

NOTE TO ALL DEVS: You are free to grab any csc you want from this zip, as long as proper credits are given and a link to this thread exist in your OP.

Features:
- CSC features will be added in upcoming releases

Below list isn't yet updated, please check the Changelogs to see which cscs have been added recently


Following countries are supported:
OMC Multi-CSC contains
"ACR", "Ghana unbranded"
"AFG", "Afghanistan unbranded"
"AFR", "Kenya unbranded"
"ARO", "Argentinia unbranded"
"ATO", "Open Austria unbranded"
"AUT", "Switzerland unbranded"
"BGL", "Bulgaria unbranded"
"BNG", "Bangladesh unbranded"
"BRI", "Taiwan unbranded"
"CAC", "Uzbekistan unbranded"
"CAM", "Cambodia unbranded"
"CHO", "Chile unbranded"
"COO", "Colombia unbranded"
"DBT", "Germany unbranded (default)"
"DKR", "Senegal unbranded"
"ECT", "Nigeria unbranded"
"EGY", "Egypt unbranded"
"EON", "Trinidad and Tobago unbranded"
"ETL", "Czech Republic unbranded"
"EUR", "Greece unbranded"
"ILO", "Israel unbranded"
"INS", "Indian unbranded"
"ITV", "Italy unbranded"
"KSA", "Saudi Arabia unbranded"
"LAO", "Thailand (unknown)"
"LUX", "Luxembourg unbranded"
"MID", "Iraq unbranded"
"MWD", "Morrocco unbranded"
"MYM", "Thailand (unknown)"
"NEE", "Nordic Countries unbranded"
"NPL", "Nepal unbranded"
"ORX", "Slovakia unbranded"
"PAK", "Pakistan unbranded"
"PHE", "Spain unbranded"
"PHN", "Netherlands unbranded"
"ROM", "Romania unbranded"
"SEB", "Latvia unbranded"
"SEE", "South East Europe unbranded"
"SEK", "Ukraine unbranded"
"SER", "Russia unbranded"
"SKZ", "Kazakhstan unbranded",
"SLK", "Srilanka unbranded"
"THL", "Thailand unbranded"
"THR", "Iran unbranded"
"TPA", "Panama unbranded"
"TPH", "Portugal unbranded"
"TTT", "Trinidad and Tobago unbranded"
"TUN", "Tunisia unbranded"
"TUR", "Turkey unbranded"
"XEF", "France unbranded"
"XEH", "Hungary unbranded"
"XEO", "Poland unbranded"
"XEU", "United Kingdom EE & Three branded"
"XFE", "South Africa unbranded"
"XME", "Malaysia unbranded"
"XSG", "United Arab Emirates unbranded"
"XSP", "Singapore unbranded"
"XTC", "Philippines Open Line branded"
"XXV", "Vietnam unbranded"
"ZTO", "Brazil unbranded"

"H3G", "United Kingdom H3G branded"
"OPS", "Australia Optus branded"
"TEL", "Australia Telstra branded"
"VAU", "Australia Vodafone branded"
Vodafone Multi-CSC contains:

"ATL", "Spain Vodafone branded"
"AVF", "Albania Vodafone branded"
"CNX", "Romania Vodafone branded"
"CYV", "Cyprus Vodafone branded"
"MOB", "Austria A1 branded"
"MTL", "Bulgaria MTL branded"
"OMN", "Italy Vodafone branded"
"PRO", "Belgium Proximus branded "
"SIM", "Slovenia Si.mobile branded"
"SWC", "Switzerland Swisscom branded"
"TCL", "Portugal Vodafone branded"
"VD2", "Germany Vodafone branded (default)"
"VDC", "Czech Republic Vodafone branded"
"VDF", "Netherlands Vodafone branded"
"VDH", "Hungary Vodafone branded"
"VDI", "Ireland Vodafone branded"
"VGR", "Greece Vodafone branded"
"VIP", "Croatia VIP-Net branded"
"VOD", "United Kingdom Vodafone branded"
"XFV", "South Africa Vodafone branded"

USA Multi-CSC contains:

"ACG", "Nextech / C-Spire branded"
"ATT", "AT&T branded"
"BST", "BST (unknown)"
"CCT", "Comcast branded"
"GCF", "GCF (unknown)"
"LRA", "Bluegrass Cellular branded"
"SPR", "Sprint (CDMA) branded"
"TFN", "Tracfone branded "
"TMB", "T-Mobile branded"
"USC", "USA unbranded"
"VMU", "Virgin Mobile USA branded"
"VZW", "Verizon branded"
"XAA", "USA unbranded (default)"
"XAS", "XAS (unknown)"

Canada Multi-CSC contains:

"BMC", "Bell Mobile branded"
"BWA", "SaskTel branded"
"CHR", "Canada (unknown)"
"ESK", "EastLink branded"
"FMC", "Fido Mobile branded"
"GLW", "Globalive Wind Mobile branded"
"KDO", "Koodo Mobile branded"
"MTB", "Belarus branded"
"RWC", "Rogers branded"
"TLS", "Telus branded"
"VMC", "Virgin Mobile branded"
"VTR", "Vidéotron branded"
"XAC", "Canada unbranded (default)"

"XSA", "Australia unbranded"

How-To install:
0. Have twrp installed/encryption removed
1. Having a backup (just in case)
2. Download csc selection and put it onto your phone
3. Boot into twrp
4. Install the zip file
5. Reboot 

How to restore the EFS-Backup:
As you all know, during the csc installation an EFS backup is made by the installer. Most have no idea how to restore it, so here you go.
1. Boot into TWRP
2. Make sure EFS partition is mounted
3. Open terminal under advanced tab
4.

Code:
dd if=/data/media/0/EFSBackup/efs.img of=/dev/block/sda3 bs=4096
5. Wait until it's finished
6. Your previous EFS has been restored successfully

Download:
CSC Selection V1.3.0 on Android Filehost
Download via GrifoDev (you need to be signed in)

Credits:
- Sammobile for firmware
Samsung for basics
- amarullz for the aroma installer


CSC Selection SM-G95XF, Tool/Utility for the Samsung Galaxy S8

Contributors
Tkkg1994 
Source Code: https://gitlab.com/Tkkg1994/CSC_Selection-S8


Version Information
Status: Stable
Current Stable Version: V1.3.0
Stable Release Date: 2017-12-21

Created 2017-07-14
Last Updated 2017-12-24

Tuesday, March 6, 2018

Samsung N920P No Network after upgrade to 6.0.1

Samsung N920 No data/preparing network FIX!!
If you have one of the Many tabs shipped to sprint that were not properly flashed for sprint service then you are one of many of us. I found this fix posted but im not sure where. You will notice no data, only 3g, only 4g or

វិធីទី១
1. Dial ##72786#
2. Press Yes to reset the Provisioning Settings to default.
3. Reboot the Phone.your data drops out at times. In the status bar 'preparing network' will Always be there and you will not have sprint zone.

វិធីទី២
BACK UP IMPORTANT INFO!!!!
Once you have your MSL this is where you input it at;
Galaxy Note 3 sprint
Data/activation problem, no sprint zone.
1. Open calculator and type (+30012012732+
2. On next screen type ##786# to open RTN menu
3. Call text support for 6 digit MSL number, (Read MSL with another tool)
4. Select reset, enter MSL number and click ok
5. Tab will reboot with sprint animation and go to hands free activation and finally fully activate.

Sunday, March 4, 2018

How To Fix Samsung Galaxy S5 SM-G900F Dead Boot Problem | Boot Recovery Guide

This Guide will help you to fix your Dead Boot Samsung Galaxy S5 SM-G900Fdevice, The dead boot problem may happen to anyone and because of many reasons, But that is not important, The most important thing is to know how you can revive the Dead Galaxy S5 SM-G900F and bring it to work again, In this guide we will show you the easiest way to perform the this repairoperation by yourself.

There's no need for any special or expensive tools to fix the dead Galaxy S5 SM-G900F device, You have to repair and get the following:
- Working Samsung Galaxy S5 SM-G900F mobile phone.
- 4GB SDHC MicroSD card.
- MSM8974PRO_boot_recovery.pit
- Normal Bootloader file: BL_G900Fxxxxxxxx_...tar

Samsung Galaxy S5 SM-G900F Dead Boot Repair Steps:

- Run Odin3.exe flasher.
- Click on PIT button and select: MSM8974PRO_boot_recovery.pit
- Click on BL button and select: BL_G900Fxxxxxxxx_...tar
Check T Flash option at Odin3 flasher.
Insert the microSD card inside a working Galaxy S5 SM-G900F mobile phone.
- Put the working Galaxy S5 SM-G900F mobile phone into Download Mode, Read this Guide for help.
- Connect the GS5 mobile phone to the computer using the USB cable.
- When Odin3 flasher detects the device, Click on Start button.
- After Odin3 do his job, You will get the PIT and Bootloader files on the microSD card.
- Remove the microSD card from the working GS5 and insert it inside the Dead Galaxy S5 mobile phone.
- Press and Hold the Volume Down key + Home key + Power key.
- If the recovery process completed successfully, You will get the dead Galaxy S5 device into Download Mode.
- Now you have to flash your device with full firmware package, Pit, Bootloader, AP, CP, And CSC files.


Notice:
If you want to buy the MSM8974PRO_boot_recovery.pit, And The Full Samsung Galaxy S5 SM-G900F firmware package, Then contact us using Gtalk: Tsar3000@gmail.com

s7 s7edge s8 s8 + note 8* Dead boot recovery file

*s7 s7edge s8 s8 + note 8* Dead boot recovery file
*s7 s7edge s8 s8 + note 8*
*Debrick sbl error*
*Dead boot recovery img*
https://mega.nz/#!0TQjmJYZ!8JTT_Ans3...tOfAQ-AiBqqEWI
*How to do*
*Open your model recovery img.bat*
*Then type your device prot no. (Qualcomm 9008)*
*Press Enter now*
*Your device live again*
*In download mode flash it right file*

Friday, March 2, 2018

Samsung Schematics & Manual Service New update link

Samsung Mobiles Schematics
01. Disassembly & Assembly Guide of Galaxy S8_Rev2.0.pdf
02. Galaxy S8 Important Management Point_Rev1.0.pdf
03. SM-G950F SVC Guide_STELS.pdf
Galaxy S8- SM-G950F-------: Download
1: Cover.pdf
2: Disassembly & Reassembly.pdf
3: Electrical Part List.pdf
4: Exploded View.pdf
5: Product Specification.pdf
6: SM-J510FN_SVC_Guide_Rev2.7.pdf
7: Troubleshooting.pdf

SM-J510FN ------------------: Download
1: SM-G930F_EPLIS_11.pdf
2: SM-G930F_EVAPL_3.pdf
3: SM-G930F_TSHOO_7.pdf
4: SM-G930F_COVER_1.pdf
5: SM-G930F_DIREY_6.pdf
6: SM-G930F_PSPEC_2.pdf

SM-G930F --------------: Download
(15-96) Repair guide for J500_J700 Charging defect or no power_Rev1
SM-J500H_Service_Schematic_150624
SM-J500H-Direy-6
SM-J500H-EPLIS-11

SM-J500H---------------Service_Schematic---- DownloadSM-T230 ------------Service_Schematic------: DownloadSamsung ---- SM-G531F -----schematic ----: Download
Samsung ---- SM-G920F -----schematic ------- : Download
A300H --Schematics & Manual Service --: Download
A500H -- Schematics & Manual Service --: Download
G313H -- Schematics & Manual Service --: Download
G355H -- Schematics & Manual Service --: Download
G530H -- Schematics & Manual Service --: Download
G850f --- Schematics & Manual Service --: Download
G7102 -- Schematics & Manual Service --: Download
GT-B2700 - Schematics & Manual Service -: Download
GT-B5310 - Schematics & Manual Service --: Download
GT-B5510 - Schematics & Manual Service --: Download
GT-B5722 - Schematics & Manual Service --: Download
GT-B7300 - Schematics & Manual Service --: Download
GT-I8190 -- Schematics & Manual Service --: Download
GT-I8500 -- Schematics & Manual Service --: Download
GT-I8510 -- Schematics & Manual Service --: Download
GT-I8552 -- Schematics & Manual Service --: Download
GT-I9000 -- Schematics & Manual Service --: Download
GT-I9001 -- Schematics & Manual Service --: Download
GT-I9003 -- Schematics & Manual Service --: Download
GT-I9023 -- Schematics & Manual Service --: Download
GT-I9060 -- Schematics & Manual Service --: Download
GT-I960I -- Schematics & Manual Service --: Download
GT-I9070 -- Schematics & Manual Service --: Download
GT-I9082 -- Schematics & Manual Service --: Download
GT-I9100 -- Schematics & Manual Service --: Download
GT-I9100G - Schematics & Manual Service --: Download
GT-I9105 -- Schematics & Manual Service --: Download
GT-I9105P - Schematics & Manual Service --: Download
GT-I9192 -- Schematics & Manual Service --: Download
GT-I9195 -- Schematics & Manual Service --: Download
GT-I9200 -- Schematics & Manual Service --: Download
GT-I9250 -- Schematics & Manual Service --: Download
GT-I9300 -- Schematics & Manual Service --: Download
GT-P5200 -- Schematics & Manual Service --: Download
GT-I9305 -- Schematics & Manual Service --: Download
GT-I9500 -- Schematics & Manual Service --: Download
GT-I9505 -- Schematics & Manual Service --: Download
GT-N7000 -- Schematics & Manual Service --: Download
GT-N7100 -- Schematics & Manual Service --: Download
GT-N7105 -- Schematics & Manual Service --: Download
GT-N8000 -- Schematics & Manual Service --: Download
GT-P1000 -- Schematics & Manual Service --: Download
GT-P1010 -- Schematics & Manual Service --: Download
GT-P3100 -- Schematics & Manual Service --: Download
GT-P5100 -- Schematics & Manual Service --: Download
GT-P6800 -- Schematics & Manual Service --: Download
GT-P7320 -- Schematics & Manual Service --: Download
GT-P7500 -- Schematics & Manual Service --: Download
GT-P7510 -- Schematics & Manual Service --: Download
GT-S3650 -- Schematics & Manual Service --: Download
GT-S5200 -- Schematics & Manual Service --: Download
GT-S5230 -- Schematics & Manual Service --: Download
GT-S5330 -- Schematics & Manual Service --: Download
GT-S5360 -- Schematics & Manual Service --: Download
GT-S5550 -- Schematics & Manual Service --: Download
GT-S5660 -- Schematics & Manual Service --: Download
GT-S5750 -- Schematics & Manual Service --: Download
GT-S5830 -- Schematics & Manual Service --: Download
GT-S8500 -- Schematics & Manual Service --: Download
GT-S8600 -- Schematics & Manual Service --: Download
GT-S5 ------- Schematics & Manual Service --: Download
GT-S6 ------- Schematics & Manual Service --: Download
S6 Edge ----- Schematics & Manual Service --: Download
SCH-I535 --- Schematics & Manual Service --: Download
SGH-A800 -- Schematics & Manual Service --: Download
SM-N900 --- Schematics & Manual Service --: Download
SM-N900A -- Schematics & Manual Service--: Download
SM-N910 --- Schematics & Manual Service --: Download
SM-N910C -- Schematics & Manual Service--: Download
SM-N9005 -- Schematics & Manual Service --: Download
SM-T211 ---- Schematics & Manual Service --: Download
SM-T310 ---- Schematics & Manual Service --: Download
SM-T311 ---- Schematics & Manual Service --: Download
SM-T705 ---- Schematics & Manual Service --: Download
SM-T805 ---- Schematics & Manual Service --: Download
SM-J120H ---Schematics+service manual-----: Download
SM-J120FN service manual + schematics------: Download
J5 Prime SM-G570F schematics service manual--: Download

J710f   
J510
J500
N5100S7 & S7 Edge---- Schematics & Manual Service 
G935F Diagram Schematic Samsung S7 Edge
More
More
More
 s3 mini
N920c 
g7105
R765A


Collection File size: 1.34 GB schematic diagrams & service manuals for Samsung : Download

if anyone have more batter services about Samsung schematic then share here.

Thursday, March 1, 2018

របៀបដាក់ទូរស័ព្ទ iPhone 8/8 Plus / X ទៅជា Recovery & DFU Mode


របៀបដាក់ទូរស័ព្ទ iPhone 8/8 Plus / X ទៅជា DFU Mode


1) ភ្ជាប់ទូរស័ព្ទ iPhone ទៅកុំព្យូទ័រហើយបើក iTunes, ត្រូវប្រាកដថាទូរស័ព្ទរបស់អ្នកបើក(មិនបិទ)។

2) ចុច វ៉ូលីមឡើង ឱ្យបានរហ័ស​រួចលែង ចុច វ៉ូលីមចុះអោយលឿន ហើយចុច Side button រហូតទាល់តែអេក្រង់ទូរស័ព្ទទៅជាព៌ណខ្មៅ

3) លែង Side button បន្ទាប់មកសង្កត់ វ៉ូលីមចុះ​​និង​Side button​ រួមគ្នាអស់រយៈពេល 5 វិនាទី

4) 5 វិនាទី​បន្ទាប់ ​​លែង Side button ប៉ុន្តែរក្សា វ៉ូលីមចុះ អោយជាប់ដែល

5) រង់ចាំរហូតទាល់តែ iTunes រកឃើញថាជារបៀប DFU ពីទូរស័ព្ទ 8 / 8plusឬ X ឯអេក្រង់វាទៅជាព៌ណខ្មៅ


ចេញពីរ DFU Mode

1) ចុច វ៉ូលីមឡើង ឱ្យបានរហ័ស​រួចលែង
2) ចុចវ៉ូលីមចុះ ឱ្យបានរហ័ស​រួចលែង
3) ចុច Side button យ៉ាងហោចណាស់ 10 វិនាទី - រហូតដល់អ្នកឃើញអេក្រង់បង្ហាញរូប  Apple ។


របៀបដាក់ទូរស័ព្ទ iPhone 8/8 Plus / X ទៅជា  Recovery  Mode

1) Volume Up បន្ទាប់មកចុចប៊ូតុង រហ័ស​រួចលែង
2) Volume Down ហើយចុចប៊ូតុង រហ័ស​រួចលែង
3) Side រហូតទាល់តែ iPhone អ្នកឃើញអេក្រង់សញ្ញា iTunes នៅលើ iPhone 

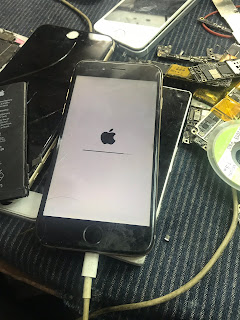
iPhone 6 error 4013 solved

Error 4013 is really the greatest weakness of Iphone 6. I have iPhone 6 with error 4013 after reprogrammed NAND in Naviplus pro3000s